Index:
- How to view/download Payslips
- How to apply for Leave
- How to update Investment Declaration
- How to apply Comp off
- How to download Form 16
- How to declare and claim FBP
- How to claim Reimbursement
- How to View/Download the Payslips from ESS
Login to ESS >> Click on the arrow symbol next to “Payslips” >> Click on “Quick View” to view the payslip for the month.
You can either download /email the payslip.

2. How to apply leave in ESS
Login to ESS >> On the homepage Click on the “Leave” icon under Apply New

Select the Leave type.

Select the Start date and To date >> Select Session >> Mention the reason >> Attach the file if any >> Click on “apply for leave”.

Note: - Once the leave request is raised in ESS, an email notification will be sent to the Reporting manager for approval with the status of Approval / Rejection of the leave request.
3.Investment Declaration/Proof Submission in ESS
As per the Union Budget 2020-21, a New Tax Regime has been introduced along with the existing Old Tax Regime, which is optional.
As an Assessee, you can choose between the New Tax Regime and the Old Tax Regime depending on what is best suitable to you from Tax planning point.
Please Note:
Income Tax will be computed based on the Tax Regime selected by you.
- If you select Old regime, you will get the exemption as per the declaration.
- If you select New Regime, except 80CCD (2) (NPS) declarations you will not get the exemption
Declare your Investment details at the start of the Financial Year, and submit the proofs at the year-end, by around Dec-Jan to preview the tax liability.
Post updating the proofs, Balance Tax payable for the Financial Year will be displayed.
Please follow the below steps to declare the Investment Amount:
Login to ESS >> On the homepage Click on the “Tax Planning” >> Click on Know Avenues to Save Tax

The below screen will be displayed:

Click “View Tax Summary & Choose/Edit Tax Option” to view/update your Tax Declarations.

Click the option” Click here to declare” to view/update various sections
Section 10 and Others
Chapter VI A Deductions
Interest on Home Loan and Other
Previous Employer Income
After clicking Click here to declare next to the Section 10 and other components, you will get the below screen.

Update the declaration amount under Planned/ Actual and save it.
Enter the Declaration amount under the PLANNED column at the start of the FY and the same will be considered for tax calculation till the actual Proofs are updated.
Update Actual amount and upload the supporting documents:
Enter actual bill/receipt amount under the ACTUAL column during Dec-Jan while submitting proofs.
Upload the scanned copies of the bills.
Follow the same process to update the Declaration amounts against HRA, Chapter VIA deductions, Previous Employer Income, Interest on Home Loan and others
Once the investment proofs are audited, the approved amount will reflect under “Approved” column which will be the final exemption amount as per the Income Tax rules.
HRA Declaration:
If rent paid for the FY exceeds INR 1.0 Lac PA/ INR 8,333 per month, then the PAN of the Landlord is mandatory
To update the Owner’s information, follow the below steps:
- In the declaration page, click “House Rent Receipt”
- Click “Add New”
- Update the Landlord details and “Save”


4.How to apply comp-off in ESS
Login to ESS >> On the homepage>> Click on the Menu Bar

2. Click on Comp-off Option:

3. Click on the Plus Icon to apply for a new comp- off:

4. Enter the date on which you have worked on (holiday/weekly off) and select the number of Days given in the dropdown. Mention the reason and click on apply.

5. The Reporting manager will approve /reject the same in the approvals section of the reporting manager’s ESS.
Once approved, you can either Request Payment or Request Leave against the comp off.

5. How to download the Form 16 from ESS
Login to ESS >> On the homepage>> Click on the Menu Bar >> Click on Reports

Select the Financial Year for which you need to download the Form 16

Then click on Form 16 or Download arrow to Download and view the Form 16

6. How to declare FBP claims in ESS
1. Login to ESS >> On the homepage>> Click on the Menu Bar >> Click on FBP

- There are 6 options
- FBP declarations
- FBP claim
- Claim history report,
- FBP bill submission report
- View detailed benefits report
- Download monthly report.

2. (A) FBP Declarations
Employees need to declare FBP, then only claims can be requested every month
To declare, click on FBP declarations.
- The FBP components will reflect based on the eligibility as per the Company Policy.
- Enter the amounts under Monthly declaration column and click Save
- Click on Submit. Once it is submitted the FBP declarations will be locked. To re-declare, get in touch with HR/Payroll admin to unlock the FBP declarations.

2. (B) FBP Claims.
To raise new FBP claims, click on FBP claims.
- Select the component based on the declaration
- Enter the Description.
- Enter Particulars like Bill No, Date and Bill Amount etc.
- To upload bills, click on Attachment Icon and upload the same.
- To add an additional line item click on Plus icon and add.
- Once all claims are updated click on Apply.

2. (C) FBP Claims History
Once claims are submitted, the screen will redirect to claims history.
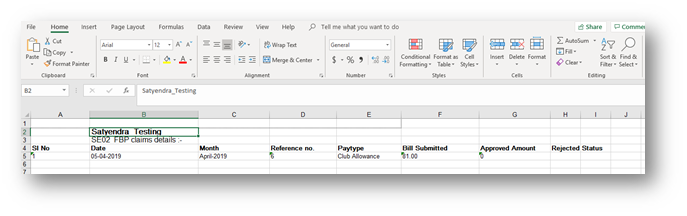
Here it displays Date, Process Month, Reference, Pay Type, Bills Submitted, Approved amount, and Status.
If the same need to be viewed in excel format, then click on Export to Excel.

Export To Excel
2. (D) FBP Bill Submission Report
To view approved bills so far, click on FBP Submission report
- Select the Particular month to view approved bill
- To take a copy of the bill, click on Print menu.

2. (D) View detailed benefits reports
To check availed amount, eligibility amount, bills carried forward and Eligibility balance, click on View detailed benefits report
- Standard eligibility reflects component-wise Annual eligibility.
- Attendance-Based Eligibility: Attendance-based components will be prorated based on the number of days worked
- Bills submitted till date will reflect under Bill submitted.
- Bills approved till date will reflect under Bills approved
- Bills rejected by Admin / HR, will reflect under Rejected Amount
- The amount availed till date will reflect under Avail Till date
- Bills that are carried forward will reflect under Bills Carry forward
- Eligibility balance means, the final eligibility balance amount for the year.
If the same need to be viewed in excel, click on Export to Excel

2. (E) Download Monthly report
To download FBP monthly report for entire financial year
Click on Download Monthly report and the same will be generated in an excel sheet.

7. How to claim Reimbursement in ESS.
Login to ESS >> On the homepage Click on the “Expense” icon under Apply New

Update the Purpose
Select the Cost Centre
Enter Project Name
Select the Expenses Head.
Select the From Date to To date ( as per the Bill )
Update the Bill Number
Update the Amount
Update the Description
Attach the Bills
Click on Apply
